


So anyway, I told Ryan this morning it was time to get the basket o' stuff cleared out (it's our last little holdout from the shower, full of bottles and passies and other random knickknacks that don't really have a place until there's a baby around). I was ready to get everything as cleared out as possible so that I can officially debut her room and call it done.
Don't worry, I had to move the swing, bouncy seat, floor play mat, and exersaucer around while I took pictures. One day they will go in her closet - probably the same day that the carseat, extra base, and stroller leave her closet and find their way into the car. But I refuse to put the seats in until we are full term, so in the closet they hide until the princess arrives. Also, for the bazillionth time, I had to pick up all of her toys and put them back in her bench. Let's just say big sister is really enjoying a real live nursery set up with brand new toys to practice playing mommy on.
So, without further ado, I present to you - Riley's room!

This is probably my favorite section. The chair is huge and super comfy - I can just see us snuggling in it. I had the pink chevron pillow made, and then custom matched the wall color to it. The pillow has her little name on it! The quilt over the chair was made by my very talented aunt - isn't is beautiful? And as you well know, I snagged the dresser from an antique store in Prairie Grove right out from under some other pregnant mamas for a mere $195. I had the horse print made at an Etsy shop - as usual, she's going to have to be able to talk and tell me she doesn't like horses before I'll back off on that! I also threw the teal lamp in there to break up the pink and grey, and to pay a little homage to Alli's teal room.


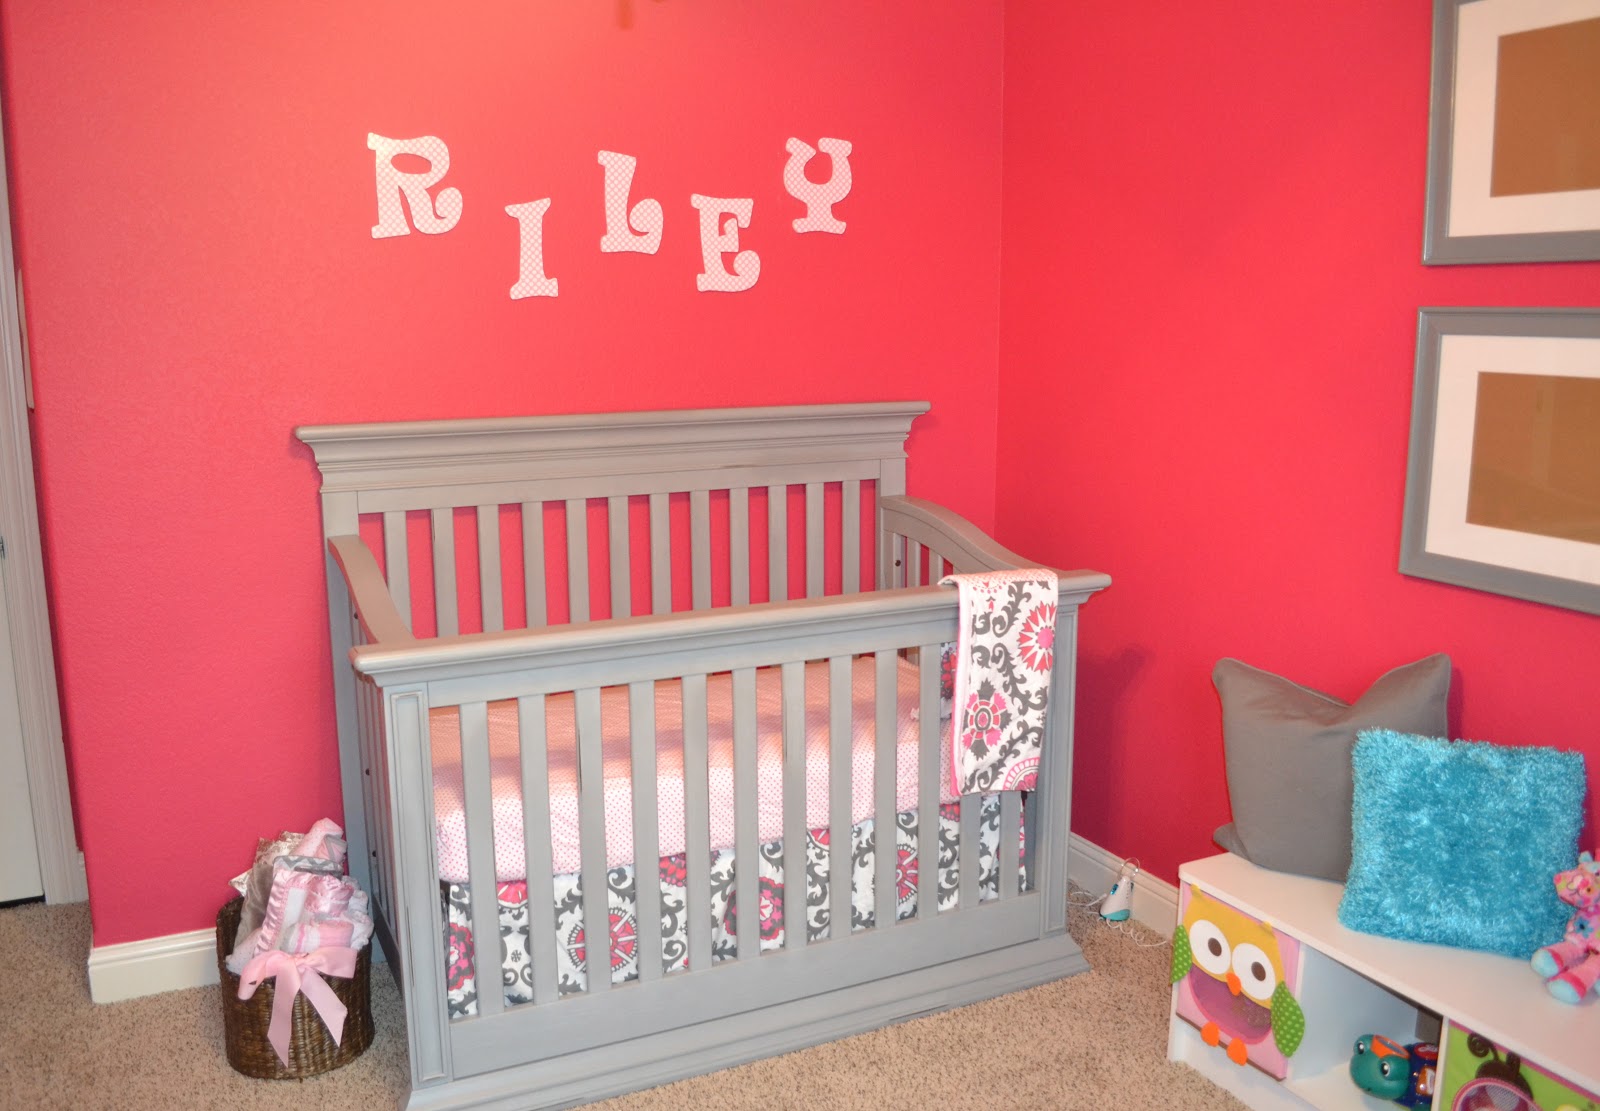
How obsessed am I with this crib? We got this and the chair at The Baby's Room in Rogers. It's so sturdy and beautiful, and it actually converts to a toddler and a full sized bed. How handy is that? After a lot of stressing about bedding, I walked into Kids Furniture in Little Rock and found this perfect set that had no bumper pads - finally! I did not want to pay for bumper pads that we won't use (and you shouldn't use them either. Did you know they are actually illegal in some states?? No pretty bed is worth the risk!!). The basket next to the crib is from the shower, and there are some gorgeous blankets wrapped up in it. I made the letters over her bed with scrapbook paper, plain letters, and Mod Podge from Hobby Lobby - click here for more on that.

I think this little nook is fun too - we got the bench, drawers, and pillows from Target. I had the frames and spray painted them gray last weekend. They are blank right now, but soon they are going to be filled with pictures - I can't wait!

I had these curtains made at an Etsy shop as well - Etsy is the decorating mama's friend! Anything you can possibly imagine can be customized there. It's awesome! Alli, Ryan, and I painted the abstract art on the wall - more Alli than anyone, but we all took a swipe with the brush. I had to really do some convincing to keep her from painting Ninja Turtles, so the next day I headed back to Hob Lob for canvasses for her room that most definitely now have Ninja Turtles all over them.

So there you have it, a little room reveal and as thorough a source list as I could muster on this rainy Saturday. If there are any questions about which Etsy shop I used or where I got anything that I didn't cover, please ask! I'm off to make a hospital packing list and Ryan's boiling bottle parts. Happy Saturday!


